Crochet Granny Harlequin Hooded Cowl: Free Pattern
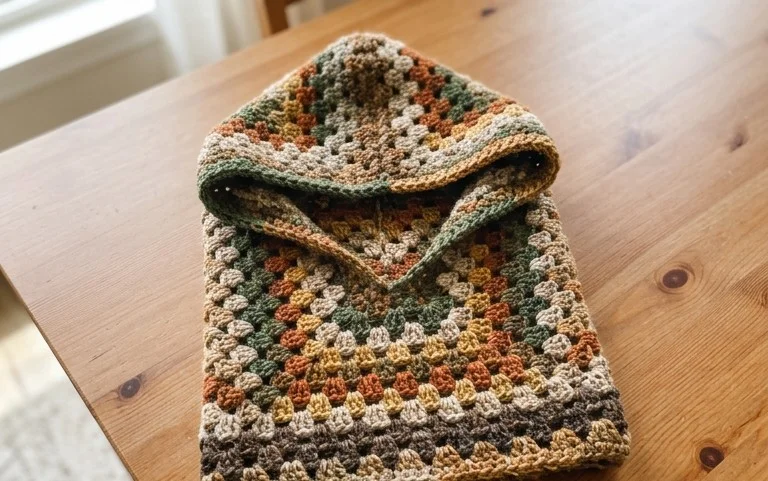
A thick wool wrap resting against your neck provides warmth during biting wind, and this hooded design creates that snug comfort with a geometric twist. This project works well for people building their skills because it relies on the rhythmic repetition of the classic granny square technique. You will connect small squares into a harlequin pattern to form a functional, wearable hood. Beginners find this assembly straightforward once they finish the individual units. Making this piece is a relaxing way to spend a quiet weekend afternoon, turning leftover scraps into a cozy accessory for yourself or a thoughtful friend.
Why You’ll Love This Pattern
The Classic Crochet Granny Square is the foundation of countless heritage projects, offering a repetitive, meditative rhythm that makes it ideal for long-term projects or quick afternoon practice. Because it uses simple double crochet clusters and chain spaces, you can easily memorize the sequence after just one round, freeing your hands to work while you listen to a podcast or watch a movie. This pattern is particularly friendly for stash-busting, as each round consumes only a small amount of yarn, allowing you to create high-contrast or tonal color palettes from leftover scraps. The structure is inherently stable, meaning it lays flat without complex blocking techniques once the final round is complete.
I finally learned how to make a proper granny square with this guide, and the instructions for the corners made all the difference in keeping it from curling up.
— Sarah, hobbyist crafter
Pattern Overview & Skill Level
- Skill Level: Beginner
- Approximate Time: 30 to 45 minutes per square
- Construction: Worked in rounds starting from the center outward
- Finished Dimensions & Sizing: Approximately 6 inches by 6 inches when using worsted weight yarn and a 5.0 mm hook
Materials & Supplies Needed
- Yarn: Worsted weight (#4), 100% acrylic or wool blend, approximately 20 yards per square.
- Hook Size: 5.0 mm (US H-8).
- Notions: Tapestry needle for weaving ends, sharp scissors.
- Safe yarn substitutions: You may use DK weight (#3) yarn with a 4.0 mm hook, though this will result in a smaller square. Cotton yarn provides a stiffer, more defined stitch, while acrylic offers a softer drape.
Stitch Guide & Abbreviations (US Terms)
- ch = chain
- st = stitch
- sl st = slip stitch
- dc = double crochet
- dc cluster = 3 double crochet stitches worked into the same space
- sp = space (the gap created by a chain stitch in the previous round)
- MR = magic ring (or ch 4 and sl st to the first ch to form a ring)
Step-by-Step Pattern Instructions
Granny Square Body
- Rnd 1: Start with a MR. Ch 3 (counts as first dc throughout), work 2 dc into the ring, ch 2, 3 dc into the ring, ch 2 — repeat from * to * two more times. Join with a sl st to the top of the beginning ch-3. (12 dc, 4 ch-2 spaces)
- Rnd 2: Sl st into the next dc and into the first ch-2 corner space. Ch 3, 2 dc, ch 2, 3 dc in same corner space. Ch 1, (3 dc, ch 2, 3 dc) in next ch-2 corner space — repeat from * to * two more times. Ch 1, join with a sl st to the top of the beginning ch-3. (24 dc, 4 ch-2 spaces, 4 ch-1 spaces)
- Rnd 3: Sl st into next 2 dc and into the corner ch-2 space. Ch 3, 2 dc, ch 2, 3 dc in corner. Ch 1, 3 dc in the next ch-1 space, ch 1, (3 dc, ch 2, 3 dc) in the next corner space — repeat from * to * two more times. Ch 1, 3 dc in the final ch-1 space, ch 1, join with a sl st to the top of the beginning ch-3. (36 dc, 4 ch-2 spaces, 8 ch-1 spaces)
- Rnd 4: Continue the established pattern. Work (3 dc, ch 2, 3 dc) into every corner ch-2 space. Work 3 dc into every ch-1 space along the sides, separated by ch 1. Join with a sl st to the top of the beginning ch-3. (48 dc, 4 ch-2 spaces, 12 ch-1 spaces)
Finishing
Once you reach the desired size, fasten off by cutting the yarn, leaving a 6-inch tail. Pull the tail through the final loop and pull tight. Thread the tail onto a tapestry needle and weave it through the back of the stitches to secure it, then trim any excess yarn.
Care & Washing Instructions
- Hand wash in cool water using a gentle detergent specifically formulated for delicate fibers.
- Lay the square flat on a clean towel and reshape it while damp to ensure the corners remain square.
- Avoid using a tumble dryer, as heat can shrink and distort the natural fiber structure of the square.
Pro Tips & Common Mistakes to Avoid
Maintaining consistent tension is the most effective way to ensure your squares have uniform dimensions. If your squares are curling, you are likely working your stitches too tightly; consider sizing up your hook by 0.5 mm. Always place a stitch marker in the top of your beginning chain-3 of every round so you can easily identify the join point at the end of the cycle. You can adjust the final size of the square by adding or subtracting rounds, but remember that each additional round will require significantly more yarn than the previous one.
Frequently Asked Questions
Can I use a different yarn weight for this pattern?
Yes, you can use any yarn weight. Keep in mind that using a lighter yarn will result in a smaller square, while a bulkier yarn will produce a larger, thicker fabric. Always match your hook size to the recommendation on the yarn label.
Is this pattern suitable for complete beginners?
This is an ideal starting project. It covers the essential skills of working in the round, maintaining stitch counts, and managing simple chain spaces without requiring complex shaping.
How do I join these squares together?
You can join squares using a whip stitch or a single crochet seam. Align the edges of two squares with the right sides facing together, then use your yarn and needle to sew through the outer loops of each stitch.
May I sell finished items made from this pattern?
You are welcome to sell finished items created from this pattern. I ask that you credit the designer whenever possible, but please do not sell or distribute the pattern itself.
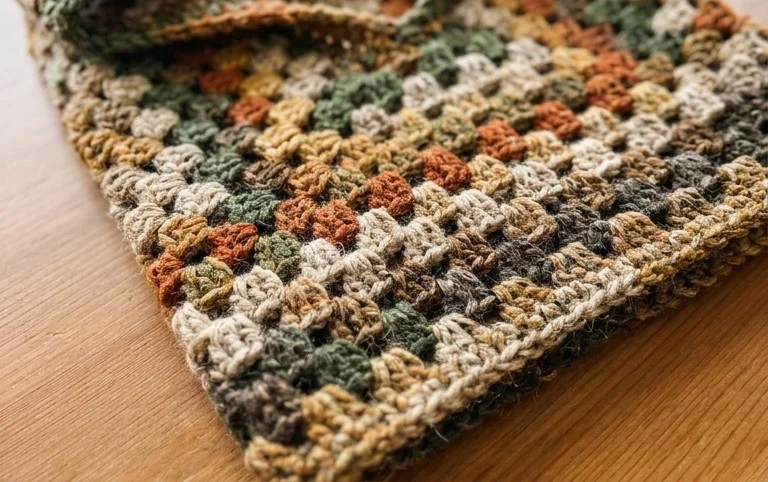
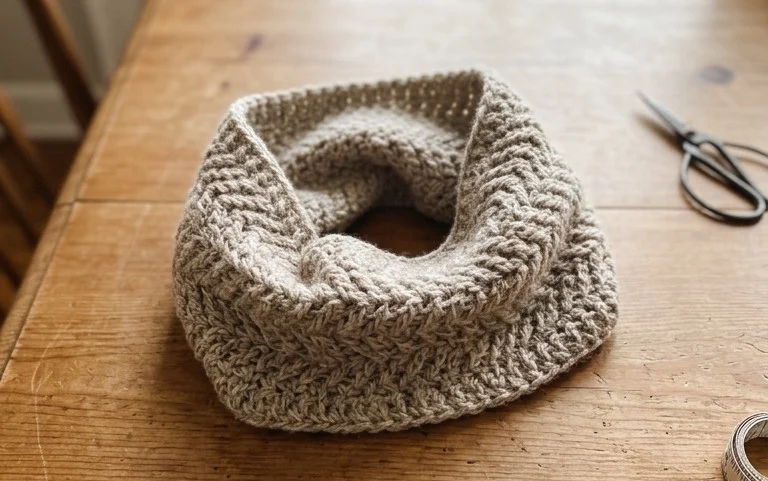
Your finished cowl drapes beautifully around the shoulders and keeps the chill away whenever you head outdoors. If you want to change the look for the next one, try working with a variegated yarn to add shifting hues without needing to switch skeins every row. I love seeing the color combinations you choose, so please post a picture of your completed work on your favorite social media site. You can find more free patterns and project ideas by browsing the archives on the rest of my blog.