Little Star Crochet Pattern: Easy Step-by-Step Dishcloth
This star-shaped piece feels remarkably firm in your hand, offering a dense texture that stands up to the toughest grime in your kitchen. It provides a satisfying weight that lighter, single-layer patterns simply cannot replicate, making it a reliable tool for daily use. Beginners will appreciate how the straightforward construction builds confidence, while experienced makers will enjoy the meditative rhythm of the thermal stitch. You will master the skill of working into the back loops and the row below to create a thick, professional finish. It transforms a simple cotton yarn into a durable, functional piece for your home.
Why You’ll Love This Pattern
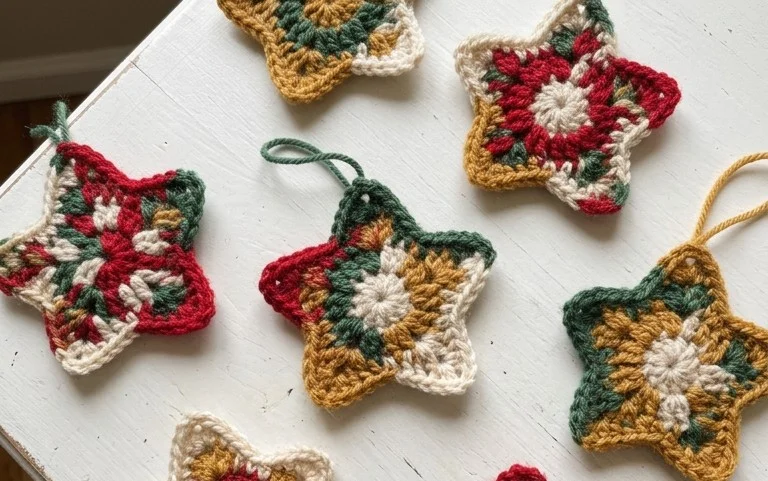
This classic crochet dishcloth relies on the textured grit of the thermal stitch, making it exceptionally effective for scrubbing surfaces. Because it is worked in a dense, double-thick fabric, it maintains its shape even after heavy use and repeated washings. You will find this project moves quickly, as the repetitive nature of the thermal stitch becomes rhythmic once you establish the first few rows. It serves as an excellent entry point for learning how to crochet into the back loops and the row below simultaneously, a technique that produces a professional-grade, sturdy textile.
I was surprised by how much thicker this dishcloth is compared to standard single crochet versions. It scrubbed my cast iron skillet perfectly without needing a plastic scouring pad.
— Sarah, home crafter
Pattern Overview & Skill Level
- Skill Level: Advanced Beginner
- Approximate Time: 90 minutes
- Construction: Worked in flat rows using the thermal stitch technique
- Finished Dimensions: 8 inches by 8 inches
Materials & Supplies Needed
- Yarn: Worsted weight (#4), 100% cotton, approximately 100 yards per cloth. Cotton is essential for absorbency and heat resistance.
- Hook Size: 5.0 mm / H-8
- Notions: Tapestry needle for weaving in ends, scissors, and a locking stitch marker to keep track of the starting edge.
- Safe yarn substitutions: You may use a cotton-acrylic blend for a softer feel, though it will be slightly less absorbent than 100% cotton. Avoid synthetic fibers like polyester or acrylic for dishcloths, as they do not absorb water well and may melt if used on hot surfaces.
Stitch Guide & Abbreviations (US Terms)
- ch = chain
- st = stitch
- sc = single crochet
- blo = back loop only
- thermal stitch = sc inserted into the blo of the current row and the remaining front loop of the row below
- turn = flip your work to begin the next row
Step-by-Step Pattern Instructions
Foundation and Base Row
- Row 1: Chain 31. Sc in the second ch from the hook and in each ch across. (30 sts)
- Row 2: Ch 1, turn. Sc in blo of each st across. (30 sts)
Working the Thermal Stitch
- Row 3: Ch 1, turn. Sc in the blo of the first st. Insert hook into the blo of the current st and also into the remaining front loop of the stitch from Row 1, pull up a loop, yarn over, and pull through both loops on the hook. Repeat from * to * across until the end of the row. (30 sts)
- Row 4 and onwards: Ch 1, turn. Sc in the blo of the first st. Insert hook into the blo of the current st and also into the unworked loop from the row immediately below. Complete the sc. Repeat across. (30 sts)
- Final Row: Continue repeating Row 4 until the piece measures 8 inches in height. Fasten off, leaving a 6-inch tail for weaving.
Finishing
Thread your tail through a tapestry needle. Weave the yarn end back and forth through the dense stitches to secure it. Since this stitch pattern is very thick, threading through the center of the fabric creates a secure, invisible anchor.
Care & Washing Instructions
- Machine wash on a warm, gentle cycle with like colors to prevent fraying.
- Lay the dishcloth flat on a towel to air dry, ensuring it is pulled into a square shape to maintain its dimensions.
- Do not bleach the cloth, as this can degrade the cotton fibers and lead to premature tearing.
Pro Tips & Common Mistakes to Avoid
Maintain consistent tension throughout the project. Because the thermal stitch is dense, tight stitches can make it difficult to insert the hook into the row below. If you find your hook struggling to pass through, try going up a half-size in hook diameter.
Use a stitch marker on the first stitch of every row. The thermal stitch can hide the ends of your rows, making it easy to accidentally drop or add a stitch, which will cause the edges to become uneven.
Weave your ends in multiple directions. Since these items are scrubbed against hard surfaces, simply tying a knot or weaving in one direction can cause the tail to work itself loose during heavy cleaning.
Adjust the width of your cloth by adding or subtracting from the starting chain. Keep in mind that every extra chain adds approximately 0.25 inches to the total width. If you make the cloth larger, ensure you have extra yarn, as the thermal stitch consumes significantly more yardage than a standard single crochet.
Frequently Asked Questions
Can I use a different yarn weight for this pattern?
While you can use a lighter weight yarn, you must adjust your starting chain count to reach your desired width. Note that a lighter weight yarn will result in a thinner, less effective scrubbing fabric.
Is this pattern suitable for someone who has just learned to chain and single crochet?
Yes, as long as you are comfortable identifying the loops of your stitches. The thermal stitch is technically repetitive, but requires careful attention to hook placement for the first few rows.
Can I sell the dishcloths I make using this pattern?
You are welcome to sell physical items you have personally crocheted from this guide. Please credit the design to this tutorial when listing your products online or at local craft fairs.
Why does my cloth look slightly wavy at the edges?
Wavy edges are usually caused by inconsistent tension or missing stitches at the ends of the rows. Ensure you are counting your stitches at the end of each row to maintain a straight, uniform edge.
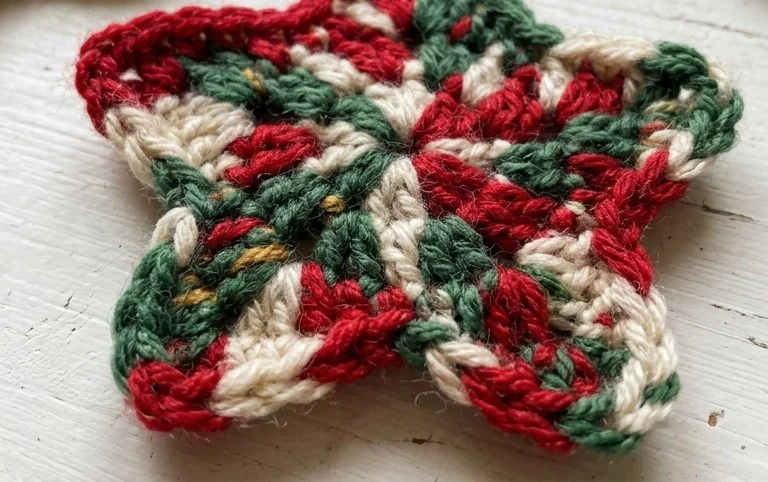
Your finished star dishcloth offers a reliable, scrubby texture that performs far better than thin supermarket versions. You might try working this pattern in variegated cotton yarn to create a playful, multicolored surface that hides stains well between washes. Please consider posting a clear photo of your finished work on social media so others can see how the thermal stitch performs with your chosen colors. If you enjoy building these practical household items, browse our blog archives for more free patterns that help you organize and clean your kitchen.