Easy Crochet Hat: Free Beginner Pattern & Tutorial
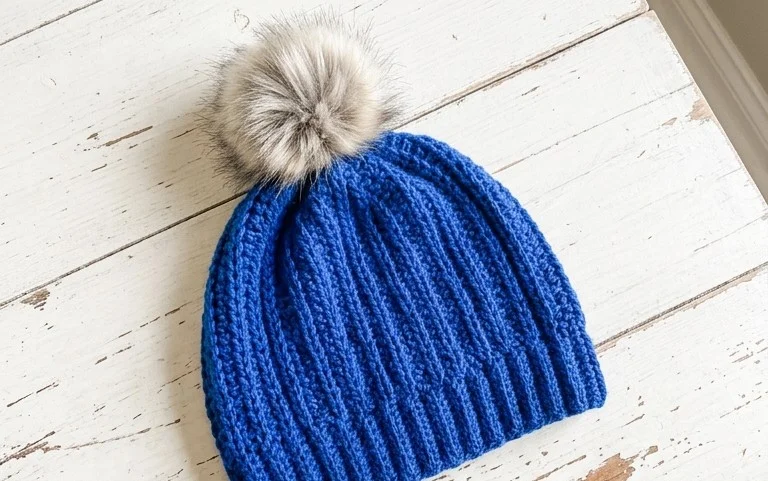
Soft wool against your ears provides the best kind of comfort on a biting winter morning. This hat features a clean, ribbed texture that looks polished enough for an office commute yet remains cozy for snowy walks. Beginners often struggle with shaping a crown, so this flat rectangle construction removes that hurdle by using simple back-loop stitches to create natural stretch. You can finish this project in a single evening while keeping your hands busy during a movie. Making handmade gifts shows genuine care, and this flexible pattern fits almost everyone on your holiday shopping list perfectly.
Why You’ll Love This Pattern
This classic crochet beanie provides a snug, professional fit that works up quickly using simple, repetitive stitches. The design relies on a basic half double crochet ribbing, which creates a natural elasticity and a clean, modern aesthetic. Because it uses a medium weight yarn, you can complete this project in a single evening, making it a reliable choice for last-minute gifts or stash-busting efforts. The texture is dense enough to offer real warmth during colder months, yet the stitch pattern remains flexible enough to sit comfortably on the head without feeling tight.
I managed to finish this hat in one sitting while watching a movie. The instructions were very straightforward, and the sizing was perfect for my husband.
— Sarah, hobbyist maker
Pattern Overview & Skill Level
- Skill Level: Beginner
- Approximate Time: 2 to 3 hours
- Construction: Worked as a flat rectangle back and forth in rows, then seamed to form a tube and cinched at the crown.
- Finished Dimensions: 20 inches circumference, fits most adult heads.
Materials & Supplies Needed
- Yarn: Worsted weight (#4), 100% acrylic or wool blend, approximately 200 yards.
- Hook Size: 5.0 mm (US H-8).
- Notions: Tapestry needle, stitch markers, and a pair of sharp scissors.
- Safe yarn substitutions: Any standard worsted weight yarn will work. Using a cotton blend may result in a heavier, less stretchy hat, while 100% acrylic provides the best bounce and warmth retention.
Stitch Guide & Abbreviations (US Terms)
- ch: Chain
- hdc: Half double crochet
- sl st: Slip stitch
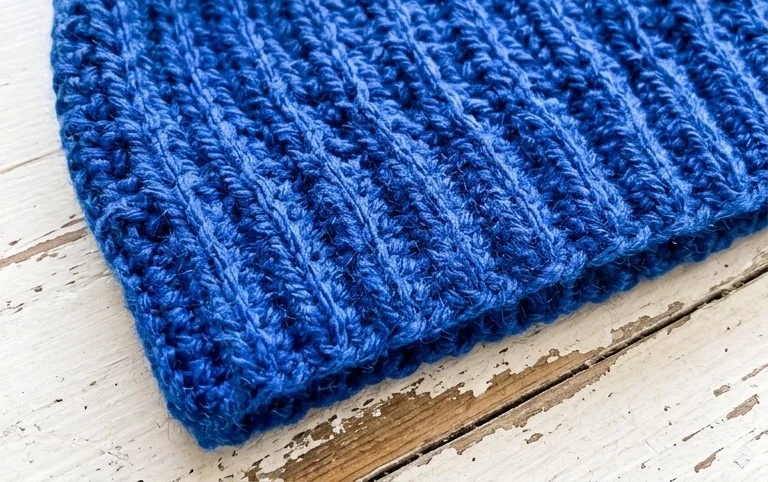
- BLO: Back loop only. This technique involves inserting your hook only into the back loop of the stitch, leaving the front loop visible to create a ribbed texture.
- st/sts: Stitch/stitches
Crochet Instructions
The hat is worked in rows, starting from the side edge and working across the height of the hat. You will create a rectangle that is folded and seamed.
- Row 1: Ch 41. Starting in the 2nd chain from the hook, hdc across. (40 sts).
- Row 2: Ch 1, turn. Hdc in the BLO of every st across. (40 sts).
- Rows 3-60: Repeat Row 2 until the piece measures approximately 20 inches when slightly stretched. (40 sts).
Assembly and Finishing
Once you reach the desired length, fasten off your yarn, leaving a 12-inch tail for sewing. Fold the rectangle in half so the short ends meet. Using your tapestry needle, whip stitch the two short edges together to form a tube. Turn the tube inside out so the seam is on the interior. Take your long yarn tail and weave it in and out along one of the open edges of the tube. Pull the yarn tail tight to cinch the top of the hat closed, then knot it securely on the inside. Weave in all loose ends to finish.
Care & Washing Instructions
- Hand wash in cool water using a gentle wool-safe detergent to maintain fiber integrity.
- Lay the item flat on a towel to air dry, reshaping it while damp to ensure it does not stretch out of form.
- Avoid using a tumble dryer, as the heat can break down the fibers and shrink the finished piece.
Pro Tips & Common Mistakes to Avoid
Maintain consistent tension throughout the project by keeping your yarn flow steady; irregular tension will cause the ribbing to appear uneven. Always place a stitch marker in the first stitch of every row to ensure you do not accidentally skip the final stitch, which keeps your edges straight. Weave your yarn tails in a zigzag pattern through the finished fabric to prevent them from slipping out over time. If you need to adjust the size, add or subtract rows in increments of two, as this will change the circumference of the hat without affecting the stitch count of the height.
Frequently Asked Questions
Can I use a bulkier yarn for this pattern?
Using a bulkier yarn will significantly change the size and drape of the hat. You would need to reduce your starting chain length to compensate for the thicker gauge and ensure the hat does not become too large for your head.
Is it easy to adjust the length of the hat?
Yes, you can easily make the hat longer or shorter by changing the number of your initial foundation chain stitches. Adding more chains increases the height, while fewer chains make a shorter, skullcap style.
How do I know if the hat will fit correctly?
Wrap your finished rectangle around your head before seaming. It should feel snug but not tight. If it feels too loose, undo the last few rows to reduce the circumference.
Can I sell the hats I make from this pattern?
You are welcome to sell finished items made from this design. I appreciate credit back to this tutorial when you list them in your shop or share them on social media.
You now hold a warm, custom piece of headwear that fits better than any store-bought alternative. Change the appearance by using a variegated yarn to add visual interest or work two strands of thinner yarn together for a thicker, chunkier result. Sharing a photo of your finished work helps others see how your color choices turned out, so please tag us when you post your progress. Visit our main archive to find more free projects for your next afternoon of stitching and creative fun.