Easy Moss Stitch Striped Blanket: Free Step-by-Step Guide
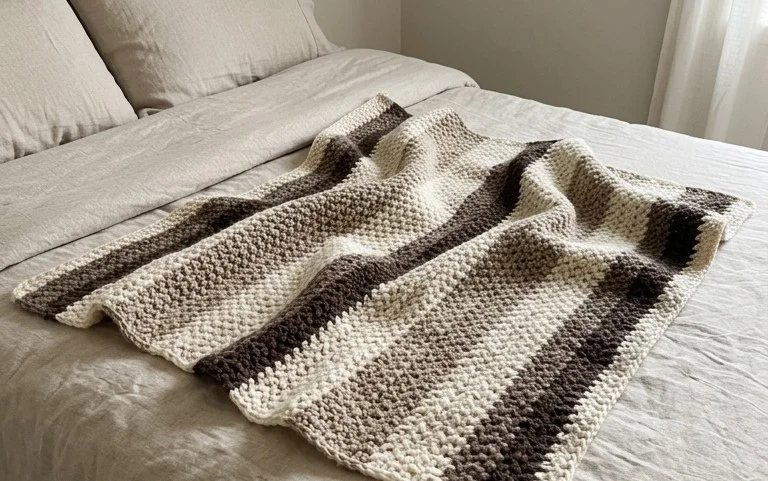
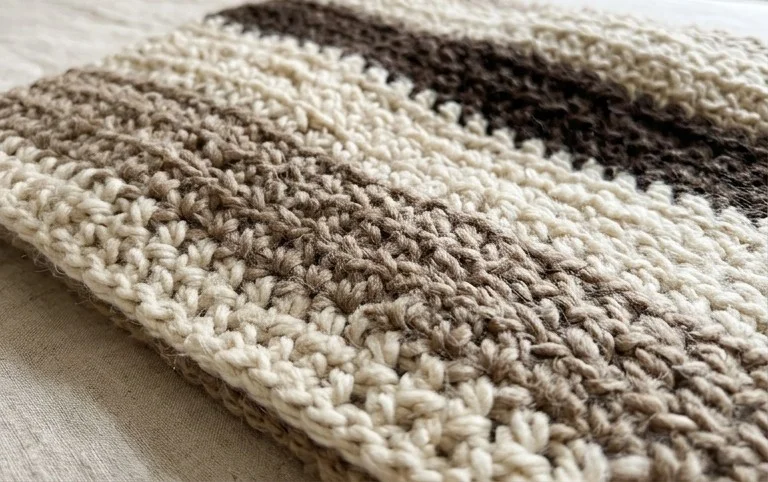
This moss stitch blanket has a dense, squishy texture that feels soft and comforting draped over your lap on a chilly afternoon. Its repeating pattern relies on single crochet stitches and chain spaces, which creates a woven look without needing advanced skills. I love how the simple color changes transform basic yarn scraps into a modern, geometric piece of home decor. Whether you want to produce a baby gift or a large throw for the couch, this project is forgiving and works up quickly. You will learn the basic moss stitch sequence today, which is the foundational technique for creating this lovely, squishy fabric.
Why You’ll Love This Pattern
The Classic Crochet Granny Square is the foundation of countless heritage-style blankets, tote bags, and cardigans. This pattern relies on a simple three-double-crochet cluster technique that works up quickly, making it a reliable project for those moments when you need a relaxing, meditative rhythm. It is an exceptionally scrap-friendly design, allowing you to use small lengths of leftover yarn to create colorful, personalized pieces. Because the construction is modular, you can choose to make a single coaster or continue adding rounds until you have a full-sized afghan square.
I finally mastered my tension after trying this classic pattern. The instructions are so clear that I finished my first stack of squares in just one evening.
— Sarah, hobbyist crocheter
Pattern Overview & Skill Level
- Skill Level: Beginner
- Approximate Time: 30-45 minutes per square
- Construction: Worked in joined rounds, starting from the center and expanding outward
- Finished Dimensions & Sizing: Approximately 6 inches square using worsted weight yarn and a 5.0 mm hook
Materials & Supplies Needed
- Yarn: Worsted weight (#4), 100% acrylic or wool blend, approximately 20 yards per square.
- Hook Size: 5.0 mm (US H-8).
- Notions: Tapestry needle for weaving in ends, scissors, and optional locking stitch markers to track the start of the round.
- Safe yarn substitutions: You may use DK weight (#3) yarn with a 4.0 mm hook for a smaller, more delicate square, or bulky weight (#5) with a 6.0 mm hook for a larger, denser texture. Note that changing yarn weight will significantly alter the final dimensions.
Stitch Guide & Abbreviations (US Terms)
- ch = chain
- sl st = slip stitch
- dc = double crochet
- cluster = a group of 3 dc stitches worked into the same space
- sp = space (the gap created by chain stitches in the previous round)
- MR = magic ring
Step-by-Step Pattern Instructions
Center and Foundation
- Rnd 1: Start with a MR. Ch 3 (counts as first dc), 2 dc in ring, ch 2, *3 dc in ring, ch 2; repeat from * twice more. Join with a sl st to the top of the initial ch-3. (12 dc, 4 ch-2 sps)
- Rnd 2: Sl st into the first ch-2 sp. Ch 3, 2 dc in same sp, ch 2, 3 dc in same sp (first corner made). *Ch 1, skip 3 dc, (3 dc, ch 2, 3 dc) in next ch-2 sp; repeat from * twice more. Ch 1, join with a sl st to the top of the initial ch-3. (24 dc, 8 ch-1 sps)
- Rnd 3: Sl st into the next ch-2 sp. Ch 3, 2 dc in same sp, ch 2, 3 dc in same sp. *Ch 1, 3 dc in the next ch-1 sp, ch 1, (3 dc, ch 2, 3 dc) in the corner ch-2 sp; repeat from * twice more. Ch 1, 3 dc in the last ch-1 sp, ch 1, join with a sl st to the top of the initial ch-3. (36 dc, 12 ch-1 sps)
Expanding and Finishing
- Rnd 4: Continue the pattern by working 3 dc into every ch-1 space along the sides, and (3 dc, ch 2, 3 dc) into every corner ch-2 space.
- Joining: When the square reaches your desired size, fasten off by cutting the yarn, pulling the tail through the final loop, and tightening.
- Weaving Ends: Use a tapestry needle to weave the starting tail into the center ring and the finishing tail through the back of the stitches to secure them invisibly.
Care & Washing Instructions
- Machine wash your finished item on a gentle cycle in cool water with a mild detergent.
- Lay the square flat on a clean towel to air dry, reshaping it into a perfect square while it is still damp.
- Avoid using a hot iron directly on acrylic yarn, as it can melt the fibers; use a steam setting from a distance if blocking is required.
Pro Tips & Common Mistakes to Avoid
- Tension management: If your corners look rounded rather than sharp, ensure you are working 3 dc, ch 2, 3 dc all into the same chain space to create a distinct 90-degree turn.
- Counting stitches: Place a stitch marker in the first ch-3 of each round to avoid losing your place, especially when working with dark-colored yarns.
- Invisible ends: To hide your color changes, pull the new yarn color through the loop of the previous stitch and work over your tail ends for at least three stitches before cutting.
- Adjusting size: To make the square larger, simply repeat round 4 indefinitely; however, ensure you have enough matching yarn, as each additional round requires roughly 15% more yarn than the previous one.
Frequently Asked Questions
Can I substitute cotton yarn for this pattern?
Yes, cotton yarn works beautifully for this square, especially for kitchen items like dishcloths. Be aware that cotton has less elasticity than wool or acrylic, so your tension might feel tighter during the process.
Is this pattern suitable for complete beginners?
This pattern is ideal for beginners because it uses basic stitches and a repetitive sequence. It helps you practice consistency in your tension and understanding how to work into chain spaces rather than individual stitches.
How do I join these squares together?
You can join squares using a whip stitch with a tapestry needle or by using a slip stitch join through the back loops of the border stitches for a more decorative, raised seam.
Am I allowed to sell items made from this pattern?
You are welcome to sell finished items created from this pattern. However, you must credit the designer and use your own original photographs for your listings.
Seeing your finished moss stitch blanket spread out for the first time is a satisfying experience that makes all those hours of stitching worthwhile. You might consider using a variegated yarn for the stripes if you want to skip the frequent color changes while keeping the visual interest high. Please share a photo of your cozy creation on social media so others can see your unique color choices. Check back on the blog for more free patterns that help you build your skills and fill your home with handmade warmth.